Friday 16 August 2013

A Tote for the 2013 Pacific NW MQG Meetup!

I signed up to make a tote for the Pacific Northwest Modern Quilt Guild Meetup Tote Bag Swap. I wish I was going to the meet up, it sounds like it will be so much fun! A few ladies from our guild are heading there, so they are taking our totes for those of us who can't attend.


I wasn't able to pick up the challenge fabric until last Thursday's guild meeting. I got started on the tote on Saturday, but was busy all day Sunday, so really had to hustle to have this done for Tuesday morning to drop it off to one of the gals as we were heading out of town. I stayed up till 3 am Monday night, before I finally packed it in. I finished the handle in the morning, a bit bleary-eyed, I might add.

I am a little concerned that it does not look modern enough, but I really tried! I found this fabulous "The British Are Coming" fabric by Michael Miller, that goes perfectly with the Robert Kaufman denim fabrics. I had some scraps of plaids that went really well with the scooter fabric, and I tried to do an improvised 4-patch, but messed up with the measurements, so sliced every other 4-patch to make thin sashing strips between the squares. I like to think it looks like cobblestone streets for the motor scooters on the fabric!


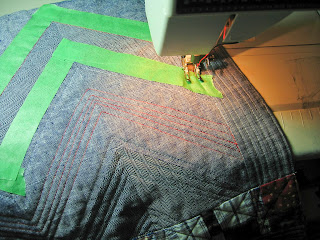
On the reverse side of the bag, I used two of the demin fabrics to make chevrons, but as the colours are so close, it doesn't show up too well, so I quilted in red thread down the centres to enhance the piecing. I "quilted the crap out it" (aka Amy's motto).


Imagine my dismay when I held the bag up and the handle was twisted through one of the loops. Grr! I was grumbling and uttering a few expletives, as I had already done the top stitching and was not looking forward to unpicking and taking the handle apart. When my hubby asked me what was wrong, and I told him (with a bit more griping), he said to me, "This might sound stupid, but why don`t you just take off the loop and untwist the handle?" Smart cookie! Thank goodness he was thinking!


On the inside pocket, I stitched on a label, and a Canadian flag, of course! I really hope someone likes it!

Pattern: Newport Tote by Lazy Girl Designs (love this pattern! This is the fourth bag I've made using this pattern and it is so fun to make!)


~Happy Quilting~

Kat


Wednesday 14 August 2013

Aloha! Surf's Up!


This behemoth is finished! A start AND finish in the same year, let alone the same summer? I almost can't believe it! I finished hand stitching the binding down last night and I am so happy with this quilt! It is big! 


I would have been too intimidated to try and quilt it myself on my home machine if I thought it was almost a double-size quilt. In my mind, I thought it was just a twin-size. 

When I showed it to my dad he thought it would fit on a double bed. Sure enough, that sucker is big enough! The quilt measures 74" x 94". It just goes to show you...what you don't know, won't hurt you! :)

This quilt is for my nephew, who is nearly 7 feet tall! He is recovering from a very serious accident, and I wanted a quilt that would be long enough for him (his feet hang over the end of the bed!). I think he'll like it! We'll be delivering it in person on Friday. Makes me happy!


I quilted in the ditch through all the sashing and free-motioned the surf boards. Not perfect, a bit wavy and wobbly, but hey, considering they're surf boards, a few waves can be a good thing!

The back is more Hawaiian fabric. I remember coming back from Hawaii, with my suitcase crammed full of fabric. When the airline staff slapped the HEAVY sticker on my bag, I thought, "Oh, no, I'm going to have to pay extra!" Thankfully, they let it go through! Whew!


~Happy Quilting!~

Kat

Monday 5 August 2013

10-Minute Block Tutorial for Darlene!

Hey, Darlene, this tutorial is for you!
(My apologies in advance for the crappy photographs.)


To make this block (I don't know the name), you will need:
 
1 -  6-1/2" feature square
4 -  2-1/2" feature squares
4 -  2-1/2" x 6-1/2" background
 
 
Start by sewing each of the 2-1/2" square to the 2-1/2" x 6-1/2" rectangle backgrounds. Press seams to feature fabric.
 
 
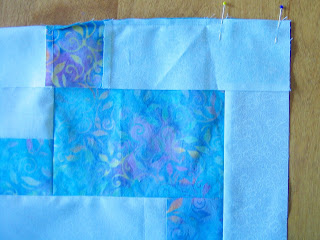
Pin one of the sewn strips to the 6.5" square and sew using a 1/4" seam, STOPPING about 1/2" from the edge of the 6-1/2" square.  Press seams to one side.


Next, rotate your square 1/4 turn counter clock-wise. Pin or line up your next rectangle strip to the pieced centre. You will see the lengths match. Stitch, press.
 
 
Repeat for the last two sides, being careful not to catch the loose "tail" of the partially stitched side in your seam. Press seams.


Pin the partial seam to the block and finish your stitching. Press to one side. 
 
 
Ta da! You're done!


Block should measure 10-1/2" unfinished, 10" finished. Super easy and super cute!

~Happy stitching!

Kat