Monday, 23 January 2012

Triangles, Triangles...Triangles Everywhere!

The FVMQ guild is participating in the Modern Quilt Guild Habitat Challenge and I received the fabric from another member who graciously passed the challenge on to me! Nice! (thanks Barb!)

Well, I have been mulling it over, eyeballing the fabric, and trying to come up with some idea that might work with this fabric. You can add solids to go with your Habitat fabrics, but no other prints.

I decided just to plunge in and start SOMETHING, anything to get over this quilter's block...so, I am making lots of triangles!

I still don't know what I am going to do with them, but it's a start, and I will let this project percolate and lead me along..wherever that may be!


Sunday, 22 January 2012

Clearing out more stuff!

So I'm not exactly getting rid of one thing a day, but I am counting the days, and then spending a bit of time to gather up a number of items to get rid of.

So for January 10 - 22, I have gathered up...

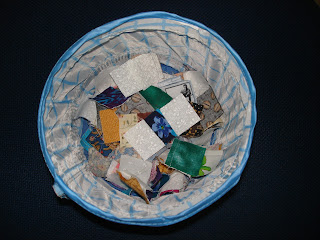
3 cds - "The Deluxe Compton's Interactive Encyclopedia and two others (1998 edition!) - never opened, oh my!

18 sewing patterns, from a different SIZE and era! I NEVER made my husband a vest, I promise!

Saturday, 21 January 2012

I love a good tute!

I had fun over the Christmas break trying out different tutorials. I don't know what it is, but during the frenzy of Christmas shopping, buying, visiting, I just want to retreat into the safe haven of my sewing room. Some of my most productive times are when I "should be" shopping or wrapping presents. Maybe it's my way of protesting consumerism? I don't know, but it's OK with me.


Sometimes I think I never get anything done, but when I started to think about it, I've made lots of things, not necessarily quilts, in the last while. Quick little fun projects with great results, and most from free tutorials featured online. For all those people that share and post their tutorials, thank you!!

Here are just a few of the things I've made since last September...

I needed a new grocery bag dispenser, so I made one using this tutorial at Moda Bake Shop.

Of course, I've already shown you the burp cloths I made using the tutorial from Nikki at Nature's Heirloom  (love Nikki's stuff!)

For the FVMQ guild's Christmas party, we all made buntings to exchange using this tutorial from Crystal at Solidity of Rainbows. Really fun! Cute and quick, too. I've made several more, but didn't quite get them finished for Christmas, so they'll be all ready for next year!

My niece and I made this cute fabric bulletin board we found on Sew Mama Sew!


My niece also made this awesome Sprocket Pillow from Cluck, Cluck, Sew!


Stash Manicure has tons of guest tutorials, and I had fun making the Tush Cush designed by Amy Bradley.


Last September at our Gathering of Friends Retreat, my sister made her very first quilt using the Jelly Roll 1600 instructions found on Youtube! It's still just a quilt top, but next time she visits, we'll get working on it again! Doesn't a Jelly Roll Race sound like fun?!

Here's my sis working on hers and her finished quilt top!

I also shared the tutorial shown here to show the ladies at the retreat how to make these cute Christmas ornaments.


Here's mine

Thanks for stopping by! Have a great day!

Monday, 16 January 2012

Back to front - Mod Sampler

Well, I have finally finished piecing the back for my Mod Sampler quilt, with leftovers from the front! It'll be a really tight fit, the back is only about an inch wider on each side than the front, so I'm kicking myself I didn't cut a wider gray strip for the left-hand side. I'll have to be extra careful when I'm layering it all together.

I tried a few different layouts on the design wall, unfortunately, I lost my camera in Seattle, so I can't show you the auditions. I'm happy with this layout!

I also had fun making a few mini design boards using this great tutorial from beeinmybonnetco.blogspot.com. These were fun to make!


Have a wonderful day!

Tuesday, 3 January 2012

Is it procrastinating if you decide to piece the back?

I love piecing quilts, and I can get them to the finished top stage in most cases, but I'm not very good at finishing them, i.e. sandwiching, quilting and binding them.

Each time I get a quilt top finished, my husband says with hope in his voice. 'Will this one be for our bed?' The answer is usually 'Yes...one day.' Some day, we'll have a dozen quilts piled on our bed, but in the meantime, I like to piece tops!

So am I travelling the path of procrastinating further when I finished the Mod Sampler top from Oh Fransson!


You already sew an extra row of blocks for the back, which is a neat thing to do.


But what if I decided to use up some of the scraps and trimmings to piece the back?


Am I being thrifty and innovative or am I just delaying the inevitable? We'll see. In the meantime, here is some progress.

Here's Lizzie, my helper, inspecting my work!
These are leaders and enders I am building a scrap quilt as I work on other quilts (more later)
Happy Quilting!

~Kat~


Sunday, 1 January 2012

Tutorial - Neck Roll Pillow Form


I have stuff. I have lots of stuff. I don't usually have lots of time, since I work full time and have a long commute, so that is why it is such a treat to be able to just 'play'!

Yesterday I decided I needed some new neck roll pillows. I made a pair well over 10 years ago, and they work fine, but one is softer than the other, and I figured it was just time. They have removable covers, so they are easily washed, and they are perfect when you're reading in bed.

I could just go out and buy some, but what is the fun in that? And besides, I have all the 'stuff' to make some, so why not use it up?

This will make two neck roll bolster pillow forms measuring about 20" long.

You will need:

1 - queen sized polyester batting
2 - 20 1/2" squares muslin or other light fabric
1 - 7" x WOF strip muslin or other light fabric
Matching thread for hand sewing
 
1.  To start with, I had this queen-sized poly batting lying around forever.


2.  Open the bag of batting and unroll the length, but don't separate the layers! The way the batting is stuffed into the bag, makes it almost perfect for the length of your bolster. 
3.  Fold the length of the batting in half to find the middle, and then cut into two pieces. Set aside for now. This allows it to expand a bit, and takes out some of the wrinkles.

4.  Take your 20 1/2" square of muslin and fold it in half lengthwise and pin into a tube. Using a 1/4" seam, sew the long seam, backstitching at the beginning and end. Press the seam as it makes a nicer finish. Repeat for the second square.
5.  Using the seam as your first 'mark', mark the fold at the opposite side with a washaway pen. Join this mark with the seam and mark the opposite side centers. Your tube openings should be divided into four. 
6.  Using scissors, on the ends of each of your tubes, carefully take little snips no more than 1/8" about every inch or so. This will help with pinning and easing the circles into the ends of the tubes. Set aside for now.

7.  If you have an Easy Circle Cut ruler, fold your 7" strip just enough so you can line up the fold mark and use the 6" finished circle slot to mark (don't cut) the fabric.

8.  Cut the circle out 1/4" beyond the marked line. Repeat to make a total of four circles. If you don't have a circle ruler, I've created a template here, click on the image to below to download the circle template.
9.  Fold your circles in half and iron to mark the folds. Unfold and match your folded points and iron again, so your circle is divided into four.
10. Start with one fold mark and match to the tube mark and pin. Pin all four marks and then continue pinning, easing the tube around the circle. Your circle should be on the bottom with the tube facing up. You can't use too many pins!


11. Now sew along the edge using a 3/8" to 1/2" seam allowance, being sure to backstitch. (I used the edge of my presser foot without selecting the 1/4" setting on my machine, so I figure that's about 3/8"). Repeat for your second bolster pillow.


12. Take the second circle and iron the seam allowance down on half the circle. This makes it easier when hand stitching the opening closed.

13. Using the same method as before, pin the circle into the tube, matching marks, EXCEPT only pin and sew half the circle to the end, backstitching at the beginning and end. Repeat for second bolster.

14. Don't turn your pillow right side out just yet. Now is the fun part (and can't be shown in pics as it's rather unlady-like!  ~wink~

15. Now take one half of your roll of batting, and roll it back up into a sausage, fairly snugly. It will measure 20" wide by about 20-ish" around. Tying a ribbon around it may help you for the next step if you don't have a helper.  

16. This is like stuffing a sausage (I've never done that!) Insert your arm into the tube (seam allowances are on the outside) and grab a firm hold onto your batting roll so the circle end is sort of around the end of batting roll.


17. Use your other hand to start pulling the bolster 'sleeve' around the batting tube. Keep a firm grip on the end of the batting as you're doing this. It may require other body parts, such as the batting being gripped between your knees, but don't give up! It ain't pretty, but it will work, just keep at it! (You can see the rick-rack I used to tie the roll, don't forget to remove it)


18. Once you've got the batting inside the tube, you can reach inside and adjust it as necessary. Your seams are now enclosed. Whew! It's really not that difficult, I promise!


19. Using matching thread, whipstitch the opening closed and you are done! Neck roll pillow form ready to be covered! Until next time...